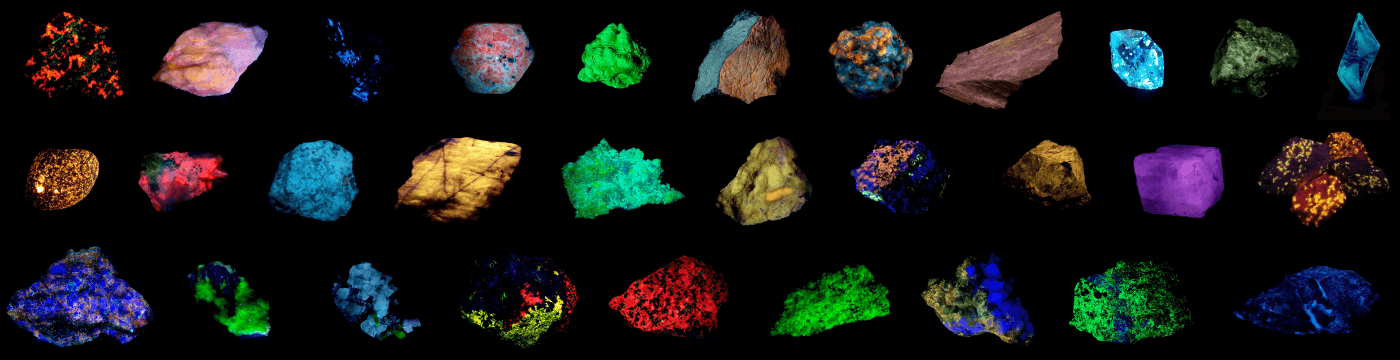
MineralApp Manual
![]()
Simone Conti [3dz2.com/mineralapp]
A small and simple application to create a database of your minerals. You can add your mineral collection, storing any details you are interested in, helping you (hopefully…) to keep your mineral collection well organized!
License and Copyright
MineralApp has been written by Simone Conti.
©️ 2019-2020 Simone Conti - 3dz2.com
MineralApp is free software: you can redistribute it and/or modify it under the terms of the GNU General Public License as published by the Free Software Foundation, either version 3 of the License, or (at your option) any later version.
MineralApp is distributed in the hope that it will be useful, but WITHOUT ANY WARRANTY; without even the implied warranty of MERCHANTABILITY or FITNESS FOR A PARTICULAR PURPOSE. See the GNU General Public License for more details.
You should have received a copy of the GNU General Public License along with this program. If not, see: https://www.gnu.org/licenses/gpl-3.0.en.html.
Postcardware
You are free to use this software. If you like it and find it useful, I would highly appreciate you sending me a postcard (or a mineral!) from your hometown.
You can find my current address on my website: 3dz2.com/contact
Install
MineralApp is written in C++ and uses wxWidgets (https://wxwidgets.org/). Precompiled binaries are available for MacOS, Windows and Ubuntu (see below). It has been tested on Arch Linux, Ubuntu 20.04, MacOS (10.15) and Windows 10. The source code is maintained on GitHub:
https://github.com/SimoneCnt/MineralApp
And the latest release can be download from
https://github.com/SimoneCnt/MineralApp/releases/latest
MacOS
For MacOS, MineralApp is packaged in a dmg file. You can download the latest version from:
https://github.com/SimoneCnt/MineralApp/releases/latest/download/mineralapp.dmg
Open it, and drag MineralApp.app into the Applications directory. Done!
Windows
For Microsoft Windows, MineralApp is packaged in a mineralapp-install.exe file. You can download the latest version from:
https://github.com/SimoneCnt/MineralApp/releases/latest/download/mineralapp-install.exe
Run (click) it and it will self-install. Only tested on Windows 10.
Linux Ubuntu
A .deb package is available for download from:
https://github.com/SimoneCnt/MineralApp/releases/latest/download/mineralapp.deb
On Ubuntu 20.04 you can install this with:
sudo dpkg -i mineralapp.deb
sudo apt-get -f install
Otherwise you can compile it from source.
Compile from source
First, get the code from GitHub:
https://github.com/SimoneCnt/MineralApp
Take a look at the Makefile and README files there and you should find enough information to compile it. Make sure to have wxWidgets and sqlite3 installed. Precompiled packages may be available from your package manager. On Linux and MacOS just clone the repository and run make; make install (make sure wx-config --cxxflags runs without errors). On Windows there is a README file in the msw directory for compiling MineralApp in Visual Studio.
On Ubuntu 20.04 this should work:
sudo apt-get install git make g++ libsqlite3-dev libwxgtk3.0-gtk3-dev libjpeg-turbo8-dev libpng-dev
git clone https://github.com/SimoneCnt/MineralApp.git mineralapp
cd mineralapp
make
sudo make install
How to Use
MineralApp is quite intuitive (I hope!) and should be quite easy to use without much introduction. After running MineralApp for the first time don’t be surprised: at first the page is mostly empty and you must add your mineral data to see anything more.
The menu commands are:
-
Mineral->Add
Adds a new mineral to the database. This will open a form, fill in whatever you want and click Save. You can add as many minerals as you like. The unique ID is automatically entered when saved. The minerals you add will appear in the left panel. -
Mineral->Modify
Opens the clicked-on/selected mineral from the left panel in the template form. You can apply any change you like. -
Mineral->Duplicate
Duplicates the previously clicked-on/selected mineral from the left panel with a new unique ID. -
Mineral->Delete
Deletes the previously clicked-on/selected mineral from the left panel. Can not be undone.
When you are done adding the minerals click on
File->Save
Saves your mineral database on disk. Default filename isminerals.sqlite3, but you can choose what you like.
When you want to open it again select
-
File->Open
Opens a database from disk. If you open a new database all unsaved entries to the previous database are lost! -
File->Export CSV
Exports a spreadsheet file of all the data (without picture, files, etc.) -
File->Close
Closes the current database. Mineral entries are NOT saved unlessFile->Saveis done before Quit!
and
MineralApp->Quit(MacOS) orFile->Quit(Linux/Windows)
Closes MineralApp. Mineral entries are NOT saved unlessFile->Saveis done before Quit!
That’s it. Some more details about some particular fields are described below. You may be interested in how to add figures or other data, see the appropriate section below.
Add your first mineral
When you open the application for the first time the screen you will see is quite empty…
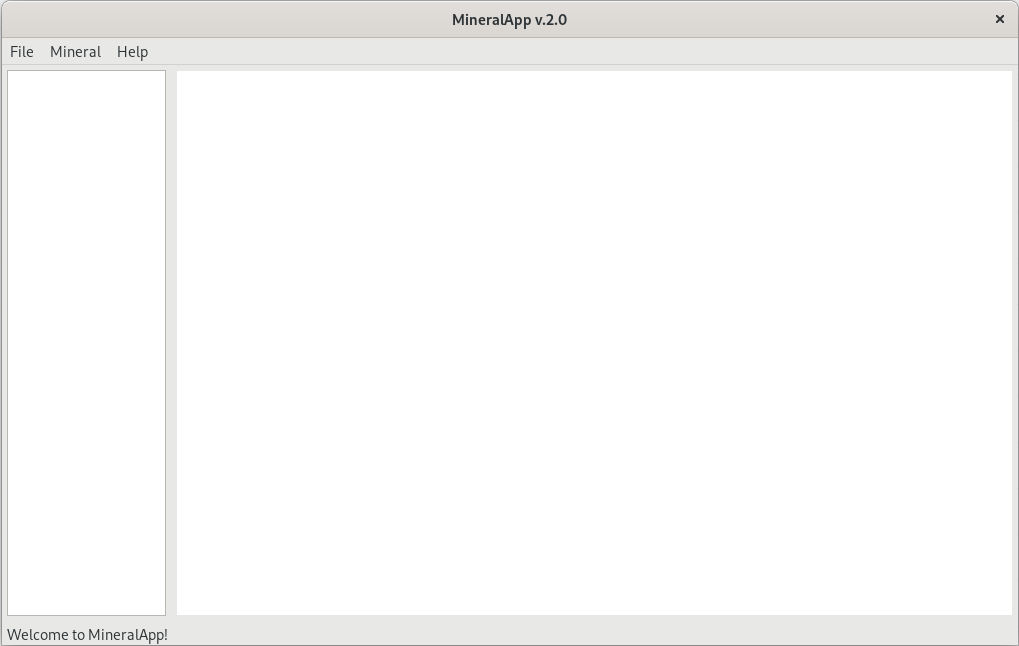
First, click on Mineral->Add. This will open a second window where you will be able to add your first mineral.
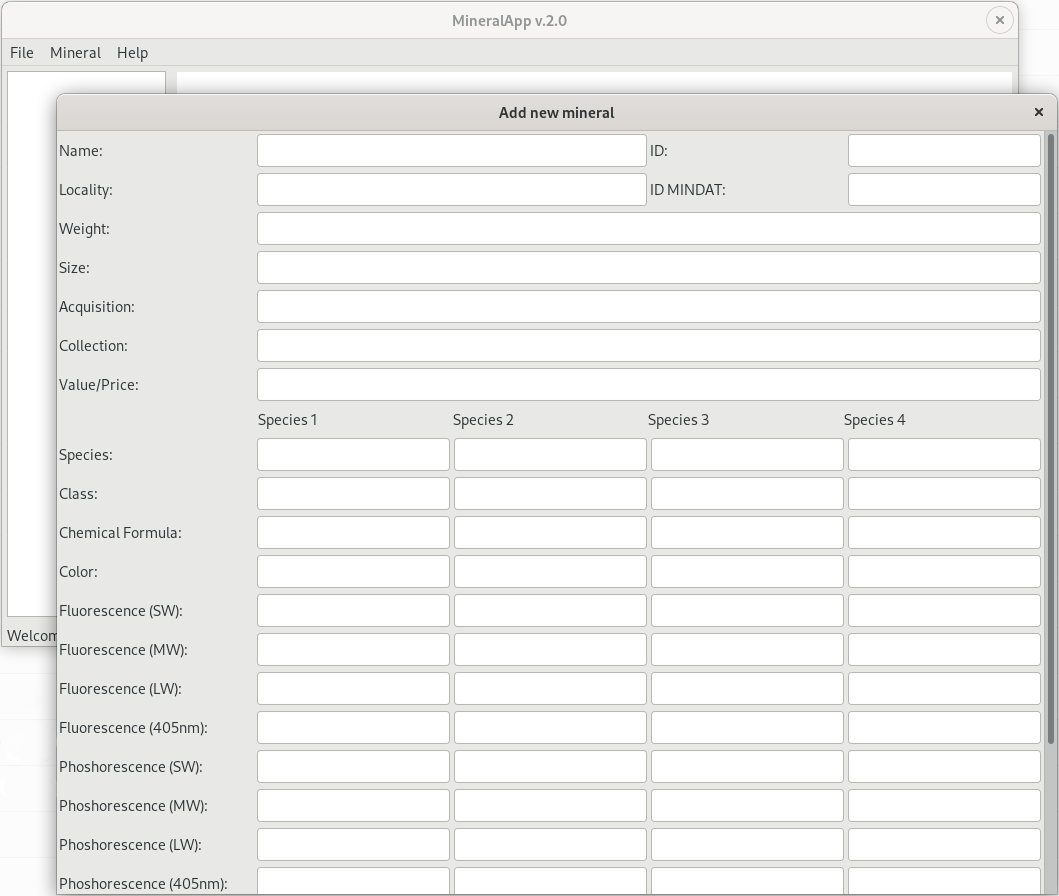
You can add a lot of info here, but you do not need to add everything. The overall idea is that you have some general information about the sample as a whole, such as its (nick)name, where it was found (locality), the weight and size, how/when you got it (acquisition), where it stored/exposed (collection), and its value (if known or you care).
As example, consider a sulphur crystal on an aragonite matrix from the Agrigento Province, Sicily, Italy.
Name: Sulphur on Aragonite
Locality: Agrigento Province, Sicily, Italy
Weight: 10g
Size: 1x2x2cm
Acquisition: January 2020; Bought in mineral museum in Milan
Collection: Italian Minerals display
Value: $5
Leave the ID empty (it will be generated automatically), or you can set it to an integer number that was not already used.
Fill “ID MINDAT” with the id of the locality determined from the Mindat database. In this example, we use the locality Agrigento Province, Sicily, Italy whose Mindat id is 2132. From the Mindat URL: https://www.mindat.org/loc-2132.html
Then there is a second section below where more specific information can be added about each particular species present in the sample. In this example we have two species (Sulphur and Aragonite), and each column in this second section is dedicated to one species (or mineral) present in the sample. You can add up to four species, no more. The first four species-specific fields are easy, for Sulphur they are:
Species: Sulphur
Class: 1.CC.05 - The Nickel-Strunz, you can find it on www.mindat.org
Chem. Formula: S8 - the chemical formula
Color: Yellow
The rest of the table is dedicated to photoluminescent properties. Being myself a collector of fluorescent minerals, this section is quite detailed, and you can specify the fluorescent and phosphorescence of each species under different wavelengths (SW, MW, LW, 405nm), as well as tenebrescence.
Last you can record if the mineral is Radioactive, and there is a last Comments field where you can write any general comment or note about the sample.
When finished be sure to click “Save” and the mineral will be shown in the main window.
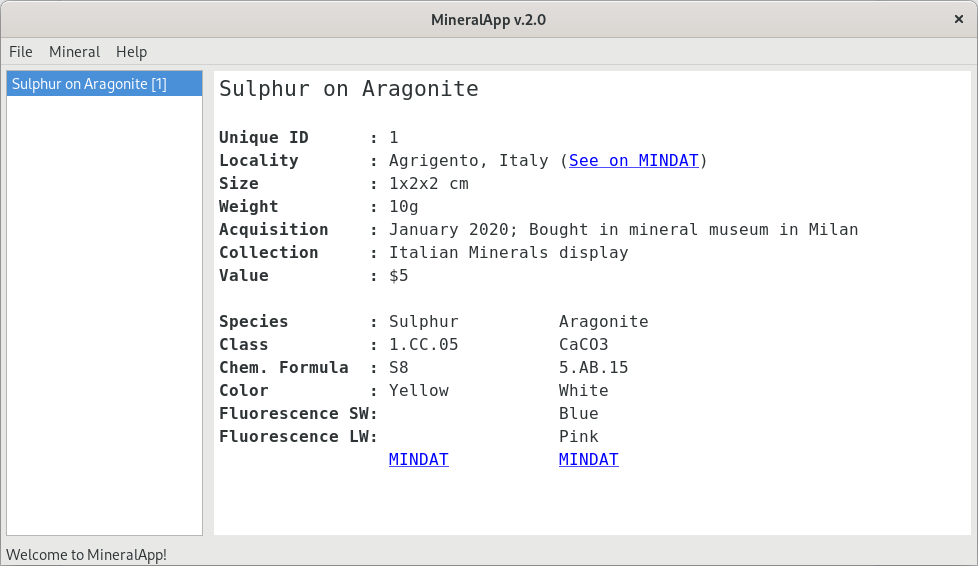
By clicking “See on MINDAT” next to the locality will open the MINDAT webpage for that locality, and similarly, the M and R links below each species will show them on MINDAT and RRUFF databases.
As you may guess, as you add more minerals they will appear in the left column, and by clicking on them you will see the details on the frame on the right.
See below for a detailed description of how (I imagined) to use each field.
Add images and data
MineralApp can show photos and figures about the minerals you inserted. To do this, you need to save the images in a specific folder in order to have MineralApp find them. When you save the collection, the default name is minerals.sqlite3. Save this file inside a new empty folder called, e.g., mineral-collection. With File Manager (PC) or Finder (Mac), inside the collection folder create a New Folder called data (name is important!). Inside the data folder create one new folder for each mineral. The name of the folder has to be the MineralApp numerical ID of the mineral (the Unique ID). It can also be the numerical ID followed by one space and then whatever you want; e.g. both 1 and 1 aragonite are acceptable. This allows you to use the sample name as a reminder to you what sample it is. You can put whatever you want in that directory. For example, picture files jpg, png, tiff, bmp etc; or document files like doc, docx, pdf etc, or movie files like mov, avi etc. Even URLs can be put in there and the link will be opened from MineralApp sample screen. MineralApp will show a preview of the images, and a link to open any other file or link.
To summarize, the MineralApp folder structure needs to be:
.../mineral-collection/
.../mineral-collection/minerals.sqlite3
.../mineral-collection/data/
.../mineral-collection/data/1 quartz/
.../mineral-collection/data/1 quartz/photo of mineral id 1.jpg
.../mineral-collection/data/1 quartz/photo2 of mineral id 1.bmp
.../mineral-collection/data/1 quartz/Video.mp4
.../mineral-collection/data/1 quartz/Movie.mov
.../mineral-collection/data/1 quartz/Movie.mov
.../mineral-collection/data/1 quartz/
.../mineral-collection/data/1 quartz/whatever.else
.../mineral-collection/data/2/
.../mineral-collection/data/2/...
You can have multiple collections, just save them in different “collection” folders.
Save and retrieve the mineral database
Once you have finished inserting all your minerals you need to save the database you have created. To save the database, just click to File->Save and pick where to save it and how to call it. The file extension is not important, by default it is sqlite3. If overwriting an already saved earlier database, you must click replace.
Warning!
By design, no automatic saving is done, so if you close the application without saving everything is lost!
When you open the application after you have previously saved a MineralApp database the last database saved will open.
To retrieve a different saved database, click to File->Open and find the database file you want to open.
Description of each field
Here a brief description of each field. These first ones are generic about the whole sample:
-
Name
A general name or nickname of the sample, like “Fluorite”, “Smoky Quartz”, or “Quartz on Muscovite”. -
ID
An increasing number for each sample; it is given automatically if left blank. Two minerals cannot have the same number. It must be an integer, otherwise a new number is generated for you. -
Locality
The locality of the sample, in which mine or state it was found. Usually something like: “cave, state, country”, e.g. “Jardinera #1 mine, Inca de Oro, Chile”. Try to be as accurate as possible. -
ID MINDAT
The ID of the locality on MINDAT. Go on www.mindat.org and find the closest locality in their database. Open the page and look at the browser address bar, it would read something like www.mindat.org/loc-2132.html The ID, in this case, is 2132. -
Weight
The weight of the sample whatever units you prefer; e.g. “10g”. -
Size
The dimension of the sample in whatever units you prefer (cm, inch, millimeters…); e.g. “1x2x1.5cm”. -
Acquisition
How and when you get possession of the sample, like “Bought at mineral show at —”, or “Found myself during field trip at —”. -
Collection
Your minerals could be divided in different collections, like fine crystals, fluorescent samples, gemstone, cabochon, etc. Use this field to classify minerals by collection. Can also be used for the storage of the sample, like in which cabined, box of drawer the specimen is stored. -
Value/Price
How much you paid for the sample, or how much it is worth, or both.
While the above fields are general for the whole sample, the following ones are specific for each species (four columns) present in the sample.
-
Species
Species in the sample. These should be accurate and standard mineral names. It will be used for a name match to MinDat.org and RRUFF.info. -
Class
The Nickel-Strunz classification, e.g. 4.DA.05 for quartz, or 3.AB.25 for fluorite. You can get it from mindat. -
Chemical formula
The chemical composition; e.g. for gypsum use “CaSO4 . 2H2O” Subscript and superscript are currently not mantained (work in progress..) -
Color
Self-explanatory… -
Fluorescence
If the mineral is fluorescent, add fluorescence color and strength (e.g. w: weak, m: medium, s: strong) for each specimen. Four entries are dedicated to fluorescence, each one for a different wavelength of the UV light: short-wave (254nm), mid-wave (310nm), long-wave (364nm), and blue laser/LED (405nm). https://www.mindat.org/glossary/fluorescence -
Phosphorescence
Similar to fluorescence. You may specify the duration of the phosphorescence. https://www.mindat.org/glossary/phosphorescence -
Tenebrescence
Is your mineral tenebrescent? https://www.mindat.org/glossary/tenebrescence
Last, mention if the sample is radioactive, and any further comment.
-
Radioactivity
Indicate if the mineral is radioactive, and its activity. https://en.wikipedia.org/wiki/Radioactive_decay -
Comments
Any other comments you have on the sample, like special notes, observations, stories, …